Alexa is very into collecting rocks, stones and pebbles every time we go outside. She can become completely and totally immersed in a playground with stones, not realizing that she sitting under the swing set playing with her stones while other kids swing above her, narrowly missing her head at every pass. It's amazing. It is one of the only activities where she can and will sit and totally concentrate for more than 30 seconds.
A few days ago, we took a walk outside when the rain had let up a little. We both needed some fresh air. Being cooped up in the apartment for more than a day will make anyone crazy. I didn't bring a stroller, or her bike. It was just the two of us strolling around the park in our neighborhood. We had time and nowhere to be, so I just let Alexa take the lead.
She strolled around the path for a few minutes, but then something caught her attention. It was a small pile of large rocks that someone had arranged on the grass. She immediately started collecting them. She would bring them to me one by one and then run back for the next rock. I kept strolling around, watching her and waiting to see what her next move would be. After a while, and two handfuls of rocks, I tried to wrangle her toward the playground. I thought this was a smart move, however, I forgot the playground base was all little pebbles.
By the end of our walk we had amassed a great collection of stones. I let her pick five out and we brought them home. When she woke up from her afternoon nap we had a great time painting the rocks. Maybe we'll start a rock garden, it'll certainly be easier to take care of than the herb garden.
Showing posts with label sensory activities. Show all posts
Monday, June 2, 2014
Thursday, May 29, 2014
Foam Dough
Monday afternoon after Alexa woke up from nap I was feeling frisky. I decided that it was definitely a messy play kind of day. I looked on my Pinterest wall to see what kind of play dough type recipe I could whip up and found foam dough. You can find the original Pinterest recipe here. I was not interested in making a whole ton of this foam dough without having first tested it out. Believe it or not, there are way too many Pinterest Fails out there. I came up with my own recipe that still allowed us to have a great time, but didn't waste all the shaving cream and corn starch in the house.
In a clean, dry bucket I placed 5 heaping tablespoons of corn starch. I let Alexa pick which color we would dye the foam dough. She chose yellow and blue. I added a little bit of yellow and a little bit of blue food coloring to a glass and poured a couple of tablespoons of water on top and mixed it together. We only have the gel food coloring, so I wanted it mixed with water before adding it to the bucket. I topped it with approximately 2-3 cups of shaving cream (really I just squirted the shaving cream out until I thought it was enough).
Alexa instantly grabbed for the shaving cream and put a handful of it in her mouth. She didn't mind how it tasted, however I told her that we don't eat shaving cream and she was satisfied enough not to do it again. I started mixing the ingredients together and it very quickly started to form a very soft dough. I grabbed some cups and clothespins to add to our sensory bucket. We played for over an hour with the green foam dough. At one point I added more shaving cream and the dough got very sticky and gooey. That was a great change in the sensory experience.
One of the reasons I liked this dough so much was that it changed as you played with it. As the shaving cream foam lost it's airyness, the dough seemed to dry up a bit. It continued to be maliable and soft and fun to play with whether extra gooey or dry. We will definitely play with this again.
I thought clean up was going to be pretty time consuming with this activity, but it wasn't. I dumped the bucket of dough into the garbage and was able to easily sweep up whatever had fallen onto the balcony floor.
In a clean, dry bucket I placed 5 heaping tablespoons of corn starch. I let Alexa pick which color we would dye the foam dough. She chose yellow and blue. I added a little bit of yellow and a little bit of blue food coloring to a glass and poured a couple of tablespoons of water on top and mixed it together. We only have the gel food coloring, so I wanted it mixed with water before adding it to the bucket. I topped it with approximately 2-3 cups of shaving cream (really I just squirted the shaving cream out until I thought it was enough).
Alexa instantly grabbed for the shaving cream and put a handful of it in her mouth. She didn't mind how it tasted, however I told her that we don't eat shaving cream and she was satisfied enough not to do it again. I started mixing the ingredients together and it very quickly started to form a very soft dough. I grabbed some cups and clothespins to add to our sensory bucket. We played for over an hour with the green foam dough. At one point I added more shaving cream and the dough got very sticky and gooey. That was a great change in the sensory experience.
One of the reasons I liked this dough so much was that it changed as you played with it. As the shaving cream foam lost it's airyness, the dough seemed to dry up a bit. It continued to be maliable and soft and fun to play with whether extra gooey or dry. We will definitely play with this again.
I thought clean up was going to be pretty time consuming with this activity, but it wasn't. I dumped the bucket of dough into the garbage and was able to easily sweep up whatever had fallen onto the balcony floor.
Monday, May 5, 2014
Pinspiration! Paper Roll Fun
I found this cool idea on, guess where? Yup, Pinterest!! It uses four things that you most likely have in your house: kitchen towel rolls or toilet paper rolls, tape, a bowl and cotton balls or pompons. I'm not kidding, this four ingredient recipe for fun took all of two minutes to assemble and Alexa has played with it for 5-10 minutes at a time, several times a day for the last few days. I'm loving it!
Find a wall or window that is just below chin level for your child. Tape the paper roll to the door or window. Put 5-6 small pompons or cotton balls in a bowl below the paper roll. Show your child how to drop the pompons, one by one, into the tube and watch them fall into the bowl. This insanely simple idea is great for independent play, helps improve fine motor skills and is fun for young toddlers.
Unfortunately, the pictures that I took came out very dark because of how bright it was outside. Also, you can see how filthy my windows are, but I have an excuse for that too....Hello, one year old in the house! Hopefully, you'll try this activity with your little one and they'll enjoy it as much as Alexa has.
The idea originally came from this blog post from Teaching Mama where she gives you twenty ideas on how to keep a toddler busy. There are several activities from this post that I have already done with Alexa, but a lot of new ideas that we will be trying out in the future!
Happy Playing!
Find a wall or window that is just below chin level for your child. Tape the paper roll to the door or window. Put 5-6 small pompons or cotton balls in a bowl below the paper roll. Show your child how to drop the pompons, one by one, into the tube and watch them fall into the bowl. This insanely simple idea is great for independent play, helps improve fine motor skills and is fun for young toddlers.
Unfortunately, the pictures that I took came out very dark because of how bright it was outside. Also, you can see how filthy my windows are, but I have an excuse for that too....Hello, one year old in the house! Hopefully, you'll try this activity with your little one and they'll enjoy it as much as Alexa has.
The idea originally came from this blog post from Teaching Mama where she gives you twenty ideas on how to keep a toddler busy. There are several activities from this post that I have already done with Alexa, but a lot of new ideas that we will be trying out in the future!
Happy Playing!
Wednesday, April 16, 2014
Homemade Finger Paints
I've had these homemade finger paints in my "Need to Try" box for quite a while now. I originally found the recipe on Pinterest. Here is the original recipe, like always, I added a little something to make it my own!
The original recipe wasn't very clear about how long to cook the mixture for, or about how long it would take to thicken, so I doubled the recipe to ensure that I would have enough goo to make six colors of paint. **The original instructions did not work for me, but I have them listed below. I also have listed the final instructions that I used to successfully create the paints.**
I started by gathering the supplies:
Supplies:
6 small glass jars with lids (glass baby food jars work great)
Small Saucepan
Spoon
Large Measuring cup
Powdered Food coloring in a variety of colors
Baby Wash
Ingredients:
3 Tablespoons Sugar
1/2 teaspoon Salt
1/2 cup Cornstarch
2 cups Water
<Original instructions> Combine ingredients in a small saucepan and warm until mixture thickens. Cool and pour into containers. Add coloring to create desired colors.
While my ingredients were "warming", I took the lids off of the jars and added 1/4 teaspoon of powdered food coloring (Lebensmittel Farbe) to each jar. I used red, orange, yellow, blue, green and purple.
After allowing the mixture (which still was not thick after cooking for 40 minutes) to cool, i added about 150ml of the mixture to each glass jar. It immediately mixed with the powdered food coloring and became a very vibrant, still liquid, mixture. I added 1-2 drops of liquid baby wash to each jar and then left it to sit, cool and congeal. An hour later, it was still completely liquid, so I sat the jars in a glass dish and added boiling water to the bottom. Let's see what happens next!
After 15 minutes sitting in the boiling water, the finger paints were still completely liquid. I thought I'd try the oven next! Haha at this point I was just too stubborn to give up. I used all of my cornstarch by making it a double batch and I was determined to have some finger paints for Alexa to paint with. The oven didn't work either (Shocker!).
I finally came up with a Hail Mary pass and it worked!
<My Instructions: that work!> Combine ingredients in a small saucepan and bring to a boil on medium-high heat. Once the mixture is bubbling for 10 seconds, remove from heat and stir rapidly while the mixture thickens. The mixture will be a little thicker than store bought finger paint. Pour into jars with food coloring and allow to cool. Final paint mixture, when cooled, will be a little chunkier than store bought finger paints, but the additional sensory stimulation while painting is really fun for the kids!
The original recipe wasn't very clear about how long to cook the mixture for, or about how long it would take to thicken, so I doubled the recipe to ensure that I would have enough goo to make six colors of paint. **The original instructions did not work for me, but I have them listed below. I also have listed the final instructions that I used to successfully create the paints.**
I started by gathering the supplies:
Supplies:
6 small glass jars with lids (glass baby food jars work great)
Small Saucepan
Spoon
Large Measuring cup
Powdered Food coloring in a variety of colors
Baby Wash
Ingredients:
3 Tablespoons Sugar
1/2 teaspoon Salt
1/2 cup Cornstarch
2 cups Water
<Original instructions> Combine ingredients in a small saucepan and warm until mixture thickens. Cool and pour into containers. Add coloring to create desired colors.
Sugar, Cornstarch and Salt Mixture
Powdered Food Coloring (Lebensmittel Farbe)
While my ingredients were "warming", I took the lids off of the jars and added 1/4 teaspoon of powdered food coloring (Lebensmittel Farbe) to each jar. I used red, orange, yellow, blue, green and purple.
After allowing the mixture (which still was not thick after cooking for 40 minutes) to cool, i added about 150ml of the mixture to each glass jar. It immediately mixed with the powdered food coloring and became a very vibrant, still liquid, mixture. I added 1-2 drops of liquid baby wash to each jar and then left it to sit, cool and congeal. An hour later, it was still completely liquid, so I sat the jars in a glass dish and added boiling water to the bottom. Let's see what happens next!
After 15 minutes sitting in the boiling water, the finger paints were still completely liquid. I thought I'd try the oven next! Haha at this point I was just too stubborn to give up. I used all of my cornstarch by making it a double batch and I was determined to have some finger paints for Alexa to paint with. The oven didn't work either (Shocker!).
I finally came up with a Hail Mary pass and it worked!
<My Instructions: that work!> Combine ingredients in a small saucepan and bring to a boil on medium-high heat. Once the mixture is bubbling for 10 seconds, remove from heat and stir rapidly while the mixture thickens. The mixture will be a little thicker than store bought finger paint. Pour into jars with food coloring and allow to cool. Final paint mixture, when cooled, will be a little chunkier than store bought finger paints, but the additional sensory stimulation while painting is really fun for the kids!
Sunday, April 13, 2014
Money in the Bank
I've been trying to come up with some interesting activities that engage Alexa and encourage her to develop her fine motor skills. One very simple activity that we have come up with is putting money in her piggy (actually a lion) bank. **This activity MUST be fully supervised by an adult.**
Whenever I have extra change, I allow Alexa to put the small coins into her lion bank. This is an EXCELLENT activity for developing fine motor skills, patience and concentration. The slit in the back of her lion bank is small and narrow. She must focus not only on getting the coin into the little slot, but also on having the coin in the correct position. After showing her once or twice, she was able to pick up a coin and get it into the slot on her own. I always hold her in my lap during this activity. I hold the lion bank in one hand and the coins in the other hand. She has figured out that putting in one coin at a time is the only way to get the money into the bank. I even let her give it a little shake once she has dropped all the coins in.
This has become a really fun activity for her. We generally do it on the weekend, that way she can see what change her Papa has in his wallet too!
Whenever I have extra change, I allow Alexa to put the small coins into her lion bank. This is an EXCELLENT activity for developing fine motor skills, patience and concentration. The slit in the back of her lion bank is small and narrow. She must focus not only on getting the coin into the little slot, but also on having the coin in the correct position. After showing her once or twice, she was able to pick up a coin and get it into the slot on her own. I always hold her in my lap during this activity. I hold the lion bank in one hand and the coins in the other hand. She has figured out that putting in one coin at a time is the only way to get the money into the bank. I even let her give it a little shake once she has dropped all the coins in.
This has become a really fun activity for her. We generally do it on the weekend, that way she can see what change her Papa has in his wallet too!
Wednesday, April 9, 2014
Qtip Watercolor Painting
All you need is some qtips, water color paints, an old yogurt container, water, some paper towels and a lot of patience. This is a great activity for developing and fine tuning those fine motor skills and it also makes a very pretty piece of art when finished.
For this activity, I have been setting up the art station on the living room coffee table. I use clear tape to tape down two sides of a piece of white paper. Then I use an old yogurt cup as a water cup and place that on a paper towel to absorb any spills. I grab 3-4 qtips and the watercolor paints. Alexa fits perfectly on the couch with the table pulled all the way up to her. I hold the water cup so she can dunk the qtip in. She practices dunking the qtip in the water and then has to concentrate to get paint onto the qtip.
She's getting very good at holding the qtip between her thumb and pointer finger like you would hold a pencil. Her control is also getting better. Her favorite part is mixing the water with the paint. After she stirs it for quite a while, I try and convince her to actually paint on the paper!
Tuesday, March 11, 2014
Spring has Sprung
We had such beautiful weather this weekend. It was nearly 60F and we took advantage of the sunshine! Saturday was Welt Frauen Tag, or International Women's Day. We spent the day in Neuhofen an der Krems with Michael's mom, sisters and the neighbors. The guys hung outside and washed the car while us gals chatted over coffee and cakes (oh yes, I said cakeS!). My mother in law made her delicious chocolate cake (which I sadly did not eat) and a yummy peach cheese cake. Alexa had a blast running all around the house and getting into everything!
Sunday was even warmer than Saturday and we were so lazy! We spent the morning relaxing and watching cartoons. (Rather, I watched cartoons while Michael slept and Alexa spread her toys all over the apartment.) When we finally got up and moving, Michael worked on cleaning up our balcony garden. He even planted our tomato seedlings into yogurt cups with dirt. We have had them in a bowl with wet cotton balls for the last few weeks. We also started some basil seedlings in wet cotton.
Alexa and I went out for a walk with her tricycle and she had me laughing hysterically the entire time. She was riding around with one hand on the handle bars and the other hand waving Miss America style to everyone we passed. She greeted them with an exuberant "HI!" and a very lovely pageant queen wave as she rode on by. It was as much a sensory walk for her as it was for me.
She took her bike for a walk by pushing it all around at the park. I even let her "walk" home on her own.
I pushed the bike and she walked (read: ran) back and forth on the sidewalk. She would get easily distracted by pebbles, people, bike riders, roller bladers, dogs, grass...it was a fun walk! She even found her shadow.
That was pretty cool. She leaned down and tried to grab her shadown and then started running after it.
It was amazing to see the world through her eyes for just a short amount of time. Everything is so new and exciting! Pebbles can occupy her curiosity for minutes, while for me they are just an inconvenience; always getting stuck in the bottom of my shoes or in the wheels of the stroller. A shadow is a new friend! A bike, roller blades or a skateboard spike new interest. Watching her take in the world around her is truly amazing.
How did you spend your weekend?
Sunday was even warmer than Saturday and we were so lazy! We spent the morning relaxing and watching cartoons. (Rather, I watched cartoons while Michael slept and Alexa spread her toys all over the apartment.) When we finally got up and moving, Michael worked on cleaning up our balcony garden. He even planted our tomato seedlings into yogurt cups with dirt. We have had them in a bowl with wet cotton balls for the last few weeks. We also started some basil seedlings in wet cotton.
Alexa and I went out for a walk with her tricycle and she had me laughing hysterically the entire time. She was riding around with one hand on the handle bars and the other hand waving Miss America style to everyone we passed. She greeted them with an exuberant "HI!" and a very lovely pageant queen wave as she rode on by. It was as much a sensory walk for her as it was for me.
She took her bike for a walk by pushing it all around at the park. I even let her "walk" home on her own.
I pushed the bike and she walked (read: ran) back and forth on the sidewalk. She would get easily distracted by pebbles, people, bike riders, roller bladers, dogs, grass...it was a fun walk! She even found her shadow.
That was pretty cool. She leaned down and tried to grab her shadown and then started running after it.
It was amazing to see the world through her eyes for just a short amount of time. Everything is so new and exciting! Pebbles can occupy her curiosity for minutes, while for me they are just an inconvenience; always getting stuck in the bottom of my shoes or in the wheels of the stroller. A shadow is a new friend! A bike, roller blades or a skateboard spike new interest. Watching her take in the world around her is truly amazing.
How did you spend your weekend?
Friday, February 28, 2014
Beach Sand Play Dough
I love trolling the internet for cool activities and projects to do with Alexa. I think these moms and teachers and caregivers who come up with these ideas are amazing. I also like experimenting with my own stuff. After finding a cool recipe for chocolate clay from Growing a Jeweled Rose, I decided to try and come up with my own recipe for some kind of play dough using stuff we had around the house.
We've been having some really beautiful weather in Linz and so I decided to try and make my own version of Cloud Dough. I grabbed some flour and baby oil because I thought that would make a great soft, fluffy textured play dough. What I ended up with was an amazing play dough that felt just like a nice sandy beach. It wasn't exactly what I had set out to make, but it ended up being a lot of fun anyway.
Alexa and I had a great time squishing and pressing the sand dough into different molds. She crushed the sand dough in her hands and into the bucket. I think this would be a very interesting addition to a sand/water table in the summer.
Beach Sand Play Dough
1 cup flour
3/8 cup baby oil
Mix well with your hands and then have fun building a sand castle with your new sand dough!
I left our sand dough out for several days. It held up perfectly, so today I put it into a clean and dry baby food jar and labeled it for storage. I'm not sure how long it will hold for, but I like being able to keep it for more than one play day.
We've been having some really beautiful weather in Linz and so I decided to try and make my own version of Cloud Dough. I grabbed some flour and baby oil because I thought that would make a great soft, fluffy textured play dough. What I ended up with was an amazing play dough that felt just like a nice sandy beach. It wasn't exactly what I had set out to make, but it ended up being a lot of fun anyway.
Alexa and I had a great time squishing and pressing the sand dough into different molds. She crushed the sand dough in her hands and into the bucket. I think this would be a very interesting addition to a sand/water table in the summer.
Beach Sand Play Dough
1 cup flour
3/8 cup baby oil
Mix well with your hands and then have fun building a sand castle with your new sand dough!
I left our sand dough out for several days. It held up perfectly, so today I put it into a clean and dry baby food jar and labeled it for storage. I'm not sure how long it will hold for, but I like being able to keep it for more than one play day.
Wednesday, February 26, 2014
Bottle Caps
Bottle caps are the new cool around here. For some unknown reason, we have an entire container of plastic bottle tops in the Tupperware drawer. While I was making lunch the other day, Alexa came across the bottle caps. She ended up testing each and everyone of them by sticking them in her mouth. She took them out of the container they were in and then put them back in. She sucked on the spout tops and then blew her cute little spit all over the kitchen. She was in baby bottle cap dreamland.
I really don't know what it is about these bottle caps, but she has seriously been playing with them almost every day for the last three days. Today, she explored with them in a big metal mixing bowl.
Beware, it's loud. Very loud. However, Alexa loved it. She played long enough for me to figure out what to make for dinner and then to actually make it. That makes this a new go to activity.
After a while I even gave her a wooden spoon to "mix" her bottle caps with. She loved it. This was even louder...just so you know.
I really don't know what it is about these bottle caps, but she has seriously been playing with them almost every day for the last three days. Today, she explored with them in a big metal mixing bowl.
Beware, it's loud. Very loud. However, Alexa loved it. She played long enough for me to figure out what to make for dinner and then to actually make it. That makes this a new go to activity.
After a while I even gave her a wooden spoon to "mix" her bottle caps with. She loved it. This was even louder...just so you know.
Wednesday, February 19, 2014
Shaving Cream Fun
Playing with shaving cream is such a cool sensory activity for little ones. At one of our Mommy & Me art classes at The Giggling Pig, Miss Lisa sprayed shaving cream on the wall for Alexa to play with. It was instantly a hit with her and all the other little ones in attendance. I decided to give the same thing a try at home.
Be forewarned, this is a VERY messy activity, but it is totally worth it.
Supplies:
Shaving cream - the foam kind, not the gel
Large bath towel
Wet washcloth
**Make sure you have ALL the supplies handy BEFORE starting this activity.**
I corralled Alexa into the corner by the balcony door and then busted out the shaving cream. As soon as I started spraying it on the window she started laughing and reaching for the shaving cream.
She smooshed it between her fingers and had so much fun spreading it all over the window and the floor. She had fun watching me write her name into the shaving cream too.
This is such a great sensory experience for little ones. Do you think you would try this at home?
Be forewarned, this is a VERY messy activity, but it is totally worth it.
Supplies:
Shaving cream - the foam kind, not the gel
Large bath towel
Wet washcloth
**Make sure you have ALL the supplies handy BEFORE starting this activity.**
I corralled Alexa into the corner by the balcony door and then busted out the shaving cream. As soon as I started spraying it on the window she started laughing and reaching for the shaving cream.
She smooshed it between her fingers and had so much fun spreading it all over the window and the floor. She had fun watching me write her name into the shaving cream too.
This is such a great sensory experience for little ones. Do you think you would try this at home?
Friday, February 14, 2014
Happy Goop Day!
Michael and I don't really celebrate Valentine's Day in your traditional flowers, candy, ooh lala kind of way. We hang out and love each other just like we do every other day, only sometimes I make brownies and we eat the whole pan together. With Alexa in the picture, we decided to do a family swimming day....and then we found out the pool doesn't open until nap time and then it's lunch time and then...it just wasn't working out. Instead, I decided to make yummy heart shaped strawberry pancakes for my two loves.
Alexa, of course, wanted to help. So, I let her mix the flour, salt and baking powder together. Then I added the wet ingredients and she REALLY wanted to help. I let her stir it a little bit, but I realized disaster was in the air. That is when I came up with the great idea of letting her make her own pancakes!
First, I gave her a bowl and a spoon that was more Alexa size. I added a little bit of flour to her bowl and let her mix and play with that for a few minutes. When she started getting bored I added some water. She had her own bowl of goop and she was thrilled!
She mixed it. She squished it. She ate it and put it in her hair. She had so much fun and I was able to make her special Valentine's pancakes while she played.
Happy Valentine's Day! I hope you and your family have a loving, playful day today!
Alexa, of course, wanted to help. So, I let her mix the flour, salt and baking powder together. Then I added the wet ingredients and she REALLY wanted to help. I let her stir it a little bit, but I realized disaster was in the air. That is when I came up with the great idea of letting her make her own pancakes!
First, I gave her a bowl and a spoon that was more Alexa size. I added a little bit of flour to her bowl and let her mix and play with that for a few minutes. When she started getting bored I added some water. She had her own bowl of goop and she was thrilled!
She mixed it. She squished it. She ate it and put it in her hair. She had so much fun and I was able to make her special Valentine's pancakes while she played.
Happy Valentine's Day! I hope you and your family have a loving, playful day today!
Thursday, February 13, 2014
Chocolate Clay: Edible, No Cook Play Clay
I found this really easy and very inexpensive recipe for edible, no cook chocolate clay at Growing A Jeweled Rose. As soon as I read the blog post, I knew Alexa and I would be trying it out. Shockingly, I did not have cornstarch or nutella at home, so this morning we ran to the store and picked up our supplies. I bought the store brand of nutella because let's be honest...it's the same exact thing and I'm using and to make play dough. The nutella knockoff and the cornstarch cost 2,68€.
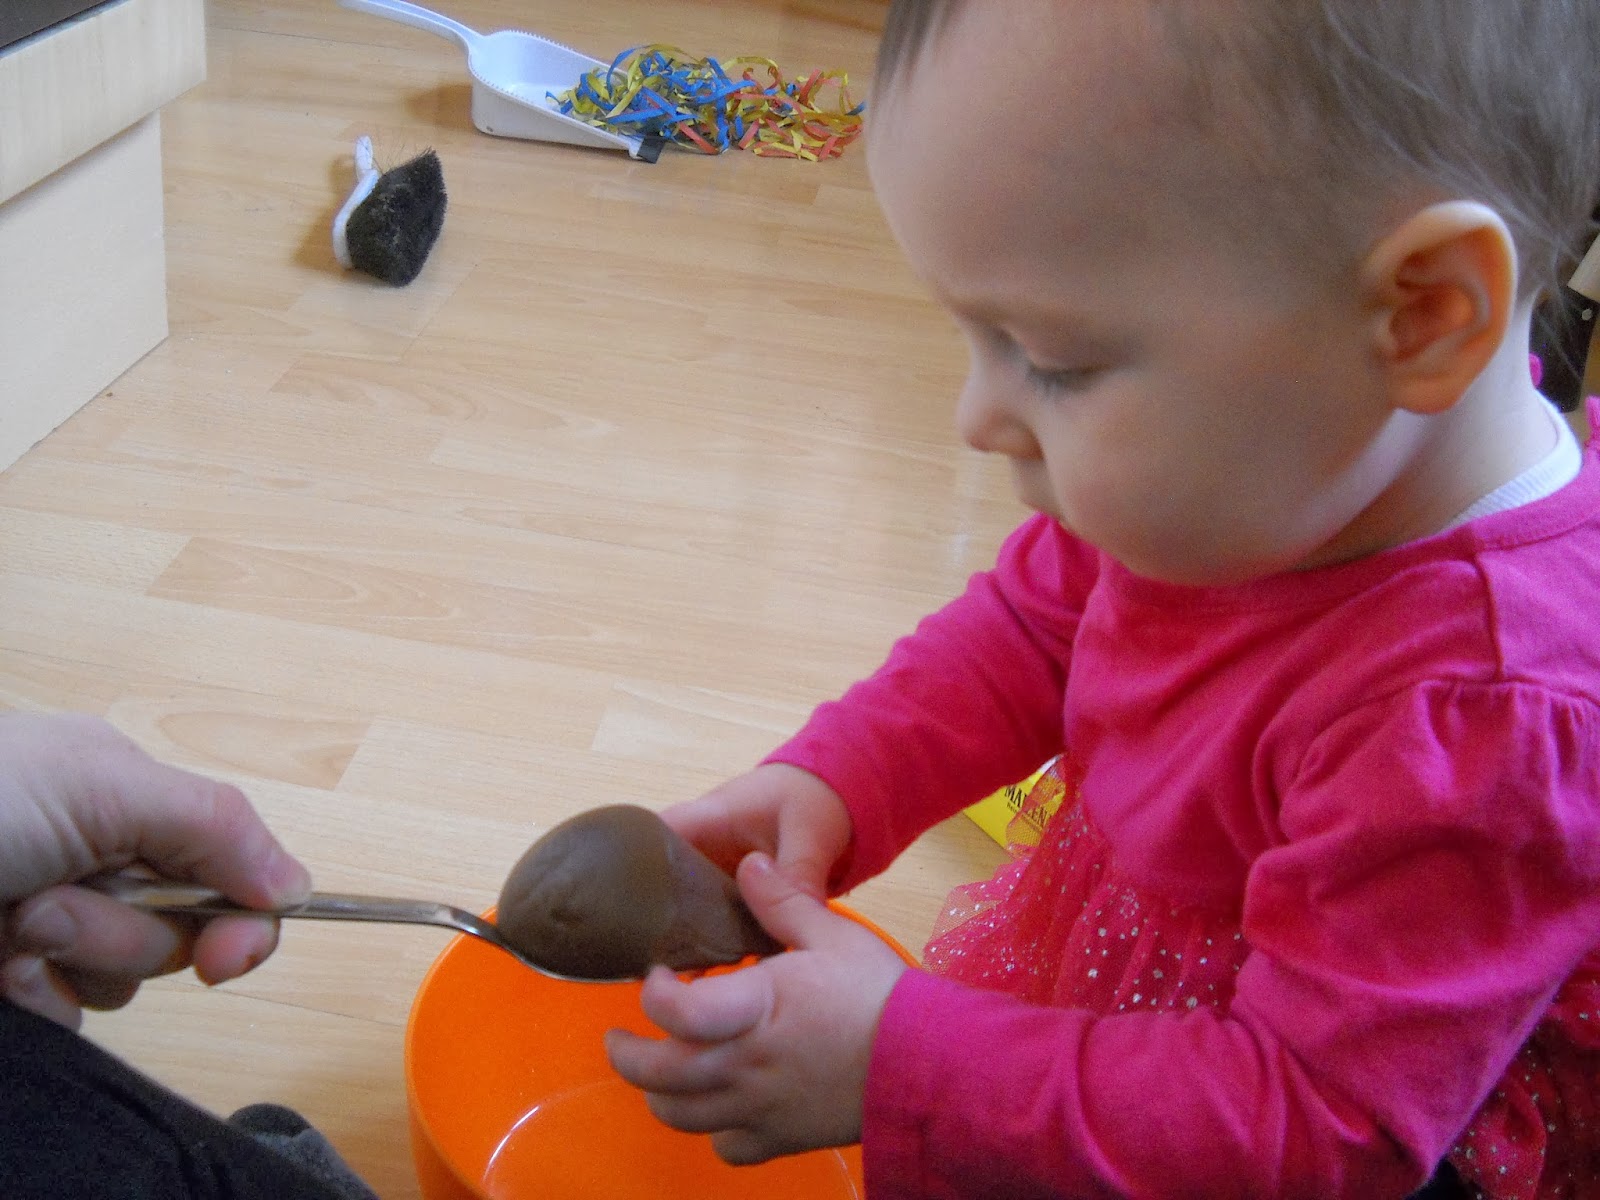
The recipe from Growing A Jeweled Rose says you can use as much nutella as you want. I wasn't sure how the recipe would turn out so I erred on the side of caution. I used one super heaping tablespoon of hazelnut cream.
Then I added two heaping tablespoons of cornstarch to the mix. The spoons were pretty useless in mixing the ingredients, so we dug in with our hands. It was messy, but felt so cool!
I let Alexa explore a little with mixture. She didn't really like how sticky it was, but yet she couldn't resist touching it repeatedly. Once it was mixed well and wasn't sticky anymore, I set Alexa up in her high chair with some cookie cutters.
She wasn't quite sure what to do at first, so I took the clay out of the bowl and showed her how to roll it in her hands. She mimicked what I was doing. Then we flattened the clay out and explored it's texture.
I'm not going to lie, she totally ate some. I'm pretty sure she would have eaten all of it if I hadn't stopped her. I can't blame her though, hazelnut cream smells great and tastes even better!
We used cookie cutters to cut out star, flower and heart shapes...all of which she promptly put in her mouth! Then we rolled balls of chocolate clay into a caterpillar shape and squished it flat to poke holes into.
Alexa enjoyed playing with the chocolate clay. I think her favorite parts were mixing it together and then tasting it! I might hold off a little longer before introducing other types of play dough because she still puts everything in her mouth, but I was glad to know that this was safe to eat.
What else would you make with chocolate clay?
The recipe from Growing A Jeweled Rose says you can use as much nutella as you want. I wasn't sure how the recipe would turn out so I erred on the side of caution. I used one super heaping tablespoon of hazelnut cream.
Then I added two heaping tablespoons of cornstarch to the mix. The spoons were pretty useless in mixing the ingredients, so we dug in with our hands. It was messy, but felt so cool!
I let Alexa explore a little with mixture. She didn't really like how sticky it was, but yet she couldn't resist touching it repeatedly. Once it was mixed well and wasn't sticky anymore, I set Alexa up in her high chair with some cookie cutters.
She wasn't quite sure what to do at first, so I took the clay out of the bowl and showed her how to roll it in her hands. She mimicked what I was doing. Then we flattened the clay out and explored it's texture.
I'm not going to lie, she totally ate some. I'm pretty sure she would have eaten all of it if I hadn't stopped her. I can't blame her though, hazelnut cream smells great and tastes even better!
We used cookie cutters to cut out star, flower and heart shapes...all of which she promptly put in her mouth! Then we rolled balls of chocolate clay into a caterpillar shape and squished it flat to poke holes into.
Alexa enjoyed playing with the chocolate clay. I think her favorite parts were mixing it together and then tasting it! I might hold off a little longer before introducing other types of play dough because she still puts everything in her mouth, but I was glad to know that this was safe to eat.
What else would you make with chocolate clay?
Tuesday, February 11, 2014
Sunday Funday: Mess Free Painting
Sunday Funday has definitely taken on a new meaning since I've become a mom. They used to be crazy days of drinking wine and hanging out with friends. Now, I drink decaf coffee and hang out with my little bean. This past Sunday was a long kind of day. Do you ever have those? Where the day just seems to stretch out and bedtime seems like it's a dream away. Well, we needed to get creative because our usual playing with toys and family snuggling just weren't cutting it.
Get Artsy. While Alexa was down for her nap, I prepped a fun mess free art activity that I could leave up for her to find when she woke up. I decided to try out mess free painting, a cool idea I found at Laughing Kids Learn. All you need is a ziplock bag, paints and some tape.
Next time I think I'll tape down all four sides of the bag. My little bean is VERY curious and nearly pulled our mess free painting down.
I'm pretty sure I had just as much fun playing with this as she did. Alexa is very into "dotting" everything from crayons to paintbrushes. Once she saw me making dots she joined in and we made an entire dot picture.
Get Artsy. While Alexa was down for her nap, I prepped a fun mess free art activity that I could leave up for her to find when she woke up. I decided to try out mess free painting, a cool idea I found at Laughing Kids Learn. All you need is a ziplock bag, paints and some tape.
Next time I think I'll tape down all four sides of the bag. My little bean is VERY curious and nearly pulled our mess free painting down.
I'm pretty sure I had just as much fun playing with this as she did. Alexa is very into "dotting" everything from crayons to paintbrushes. Once she saw me making dots she joined in and we made an entire dot picture.
Wednesday, February 5, 2014
Playing with Squish!
I found this really cool project idea over at Hands On As We Grow that uses your most basic ingredients: flour and water. They call it flour piping, but we called it Squish! Alexa had the most amazing time creating and playing with Squish. I hope you and your kids have just as much fun!
First, gather your supplies...
Flour
Water
Bowl
Spoons
Plastic sandwich bags
Washable paints (Optional)
I poured a bunch of flour into a bowl and handed a spoon to Alexa. She thought it was so cool that she was allowed to stir and make a mess with the flour.
Then, I used my watering can and added water. She stirred and played in the flour water mixture the entire time. She tested the texture with her fingers and squished it in her hands. She even tasted it. I helped her stir the flour water mixture until it was nice and soupy.
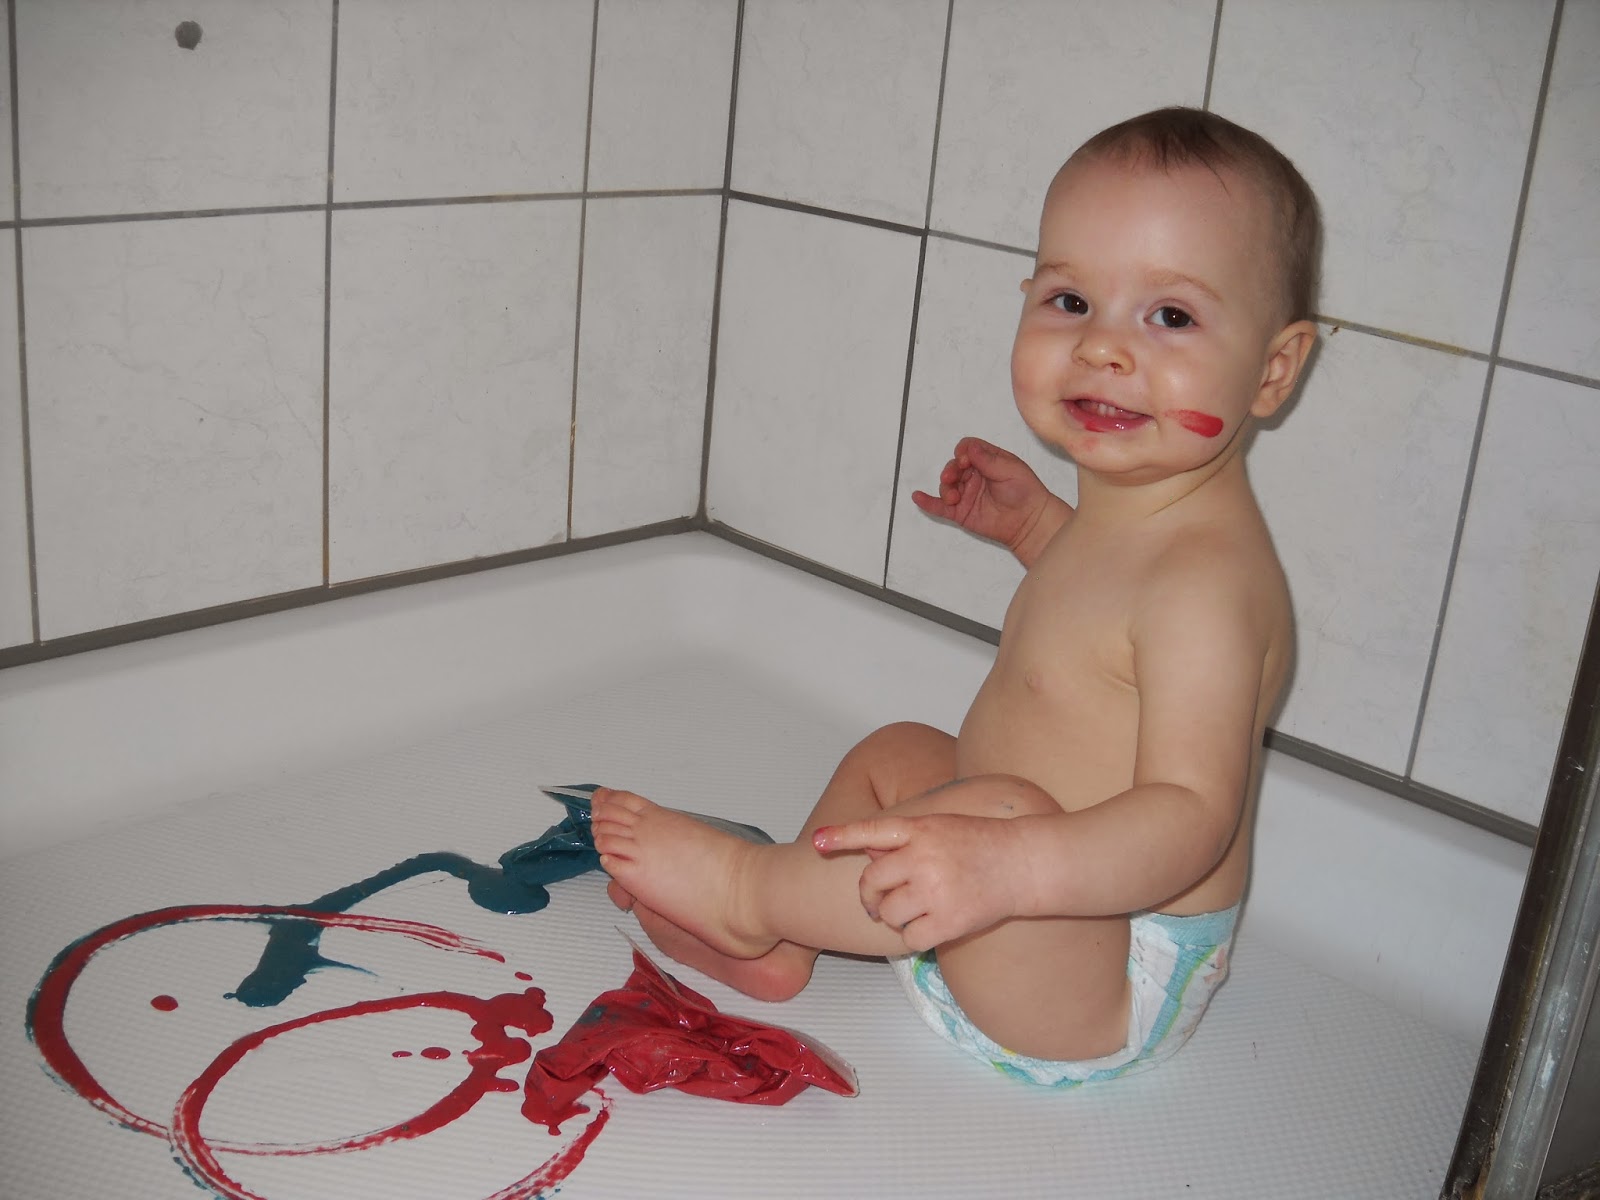
After we got our Squish to the right consistency, I scooped it into the sandwich bags. We did two sandwich bags with one teaspoon (you probably don't even need that much) of paint per baggie. We used blue and red washable finger paints. I suggest letting a grown up scoop the Squish into the bags because it was super messy. I ended up quickly washing off the baggies before giving them back to Alexa.
Alexa LOVED squishing the baggies to mix all the paint. She wasn't quite sure what to do at first, but once she saw the paint starting to spread she went to town squishing and kneading the bags.
At Hands On As We Grow, they piped the Squish onto paper. That was a little too messy for us, for older toddlers I think it is a perfect idea, so we went to the shower instead! I stripped Alexa down to her diaper and put her and her baggies of Squish right in the shower. I snipped a corner off of each baggie and she was able to paint and play for quite a long time.
I actually think she would have played a lot longer, but she started eating the Squish by the handful and I didn't want her to get a tummy ache. Clean up was a breeze...I turned the shower on and washed it all down the drain. Alexa even benefited from a bubble bath to wash away all the Squish.
Happy Squishing!
First, gather your supplies...
Flour
Water
Bowl
Spoons
Plastic sandwich bags
Washable paints (Optional)
I poured a bunch of flour into a bowl and handed a spoon to Alexa. She thought it was so cool that she was allowed to stir and make a mess with the flour.
Then, I used my watering can and added water. She stirred and played in the flour water mixture the entire time. She tested the texture with her fingers and squished it in her hands. She even tasted it. I helped her stir the flour water mixture until it was nice and soupy.
After we got our Squish to the right consistency, I scooped it into the sandwich bags. We did two sandwich bags with one teaspoon (you probably don't even need that much) of paint per baggie. We used blue and red washable finger paints. I suggest letting a grown up scoop the Squish into the bags because it was super messy. I ended up quickly washing off the baggies before giving them back to Alexa.
Alexa LOVED squishing the baggies to mix all the paint. She wasn't quite sure what to do at first, but once she saw the paint starting to spread she went to town squishing and kneading the bags.
At Hands On As We Grow, they piped the Squish onto paper. That was a little too messy for us, for older toddlers I think it is a perfect idea, so we went to the shower instead! I stripped Alexa down to her diaper and put her and her baggies of Squish right in the shower. I snipped a corner off of each baggie and she was able to paint and play for quite a long time.
I actually think she would have played a lot longer, but she started eating the Squish by the handful and I didn't want her to get a tummy ache. Clean up was a breeze...I turned the shower on and washed it all down the drain. Alexa even benefited from a bubble bath to wash away all the Squish.
Happy Squishing!
Wednesday, January 22, 2014
5 Sensory Stimulating Activities For Your 9 Month Old
(I was working on this post before we left for vacation. I never got around to posting it then, but I didn't want you to miss out on these cool activities for your little one! I hope you enjoy them. Happy playing!)
1. Sensory bins. There are countless varieties of sensory bins that you can easily make with things around the house. Alexa's current favorite is a water sensory bin.
Water Sensory Bin
You'll need a small bucket, warm water, baby wash for bubbles, small bath toys or small plastic toys, scoops and a thick towel. Put about 1-2 inches of warm water into your bin, add a squirt or two of baby wash while filling the bin, then add toys and scoops. Place the bin on a thick towel. Now baby is ready to play! **Adult supervision is mandatory when children are playing in or around water.
2. Sensory bottles. Sensory bottles are a cheap and easy way to entertain any bored child! For a 9 month old, it is important to consider safety when making your sensory bottle. Be sure to super glue the lid closed so that any small pieces can not be reached or eaten by your little one. There are lots of different themes you can use for Sensory bottles. A very easy sensory bottle is the sound bottle. Other themes include colors, sizes, etc. For color bottles, you can use colored pompoms or glitter.
Make your own Sound Bottle
Supplies - super glue, clean, dry empty water bottle and dry beans, rice, or sand. Fill the empty water bottle with a few tablespoons of dry beans, rice or sand. Super glue the lid onto the bottle. Now baby has a fun new toy that makes a fun sound and is visually stimulating as well.
3. Bubbles. Blowing bubbles is such a simple and inexpensive way to stimulate your baby's senses. There are lots of cool ways to expand upon blowing bubbles by creating glow in the dark bubbles, colored bubbles, or even edible bubbles!
4. Finger painting. One of Alexa's absolute, most favorite things to do! Finger painting can be messy, but there are so many ways to cut down on the mess. Adding a drop or two of baby wash to the paint and having baby paint in just a diaper with a towel over the high chair, are just a couple of ways to cut down on the mess. There are even recipes available to make your own homemade finger paint for infants and toddlers!
5. Tissue Play. I spent 1.34€ on a box of tissues and gave it to Alexa. I showed her how to pull the tissues out of the box, wave them around, rip them up, or wipe her face with them. She will sit and play with these for 10-20 minutes at a time. After a month, we still had the same box of tissues and she still enjoys pulling them out. Awesome, inexpensive activity. Plus, as a bonus, clean up is super quick! When she is a little older I will show her how to pull them out and then put them back into the box.
1. Sensory bins. There are countless varieties of sensory bins that you can easily make with things around the house. Alexa's current favorite is a water sensory bin.
Water Sensory Bin
You'll need a small bucket, warm water, baby wash for bubbles, small bath toys or small plastic toys, scoops and a thick towel. Put about 1-2 inches of warm water into your bin, add a squirt or two of baby wash while filling the bin, then add toys and scoops. Place the bin on a thick towel. Now baby is ready to play! **Adult supervision is mandatory when children are playing in or around water.
2. Sensory bottles. Sensory bottles are a cheap and easy way to entertain any bored child! For a 9 month old, it is important to consider safety when making your sensory bottle. Be sure to super glue the lid closed so that any small pieces can not be reached or eaten by your little one. There are lots of different themes you can use for Sensory bottles. A very easy sensory bottle is the sound bottle. Other themes include colors, sizes, etc. For color bottles, you can use colored pompoms or glitter.
Make your own Sound Bottle
Supplies - super glue, clean, dry empty water bottle and dry beans, rice, or sand. Fill the empty water bottle with a few tablespoons of dry beans, rice or sand. Super glue the lid onto the bottle. Now baby has a fun new toy that makes a fun sound and is visually stimulating as well.
3. Bubbles. Blowing bubbles is such a simple and inexpensive way to stimulate your baby's senses. There are lots of cool ways to expand upon blowing bubbles by creating glow in the dark bubbles, colored bubbles, or even edible bubbles!
4. Finger painting. One of Alexa's absolute, most favorite things to do! Finger painting can be messy, but there are so many ways to cut down on the mess. Adding a drop or two of baby wash to the paint and having baby paint in just a diaper with a towel over the high chair, are just a couple of ways to cut down on the mess. There are even recipes available to make your own homemade finger paint for infants and toddlers!
5. Tissue Play. I spent 1.34€ on a box of tissues and gave it to Alexa. I showed her how to pull the tissues out of the box, wave them around, rip them up, or wipe her face with them. She will sit and play with these for 10-20 minutes at a time. After a month, we still had the same box of tissues and she still enjoys pulling them out. Awesome, inexpensive activity. Plus, as a bonus, clean up is super quick! When she is a little older I will show her how to pull them out and then put them back into the box.
Subscribe to:
Posts (Atom)